


If you’ve ever walked past a wooden pallet lying around and thought, “Hmm, I could probably do something with that,” you’re absolutely right. Today, we’re diving into a super simple and satisfying project: making planters from wooden pallets!
Whether you’ve got a garden, balcony, or just a sunny spot by the window, this is the kind of DIY that gives your plants a stylish new home and saves a chunk of wood from ending up in landfill. Win-win.
🛠️ What You’ll Need
Before we roll up our sleeves, here’s your basic toolkit:
- A wooden pallet (make sure it’s heat-treated, not chemically treated—look for the “HT” stamp)
- Saw (hand saw or circular saw)
- Hammer or crowbar
- Sandpaper or sander
- Nails or screws
- Drill or screwdriver
- Liner (landscape fabric or weed barrier)
- Staple gun
- Potting soil + your fave plants or herbs
Optional: paint, stain, or wood sealant if you’re going for a polished look.
✂️ Step-by-Step Guide
1. Pick Your Pallet Wisely
Grab a pallet that looks solid and hasn’t been soaked or moldy. If you’re sourcing it from a store or warehouse, ask if it’s safe for reuse.
💬 Question for the comments: Ever found a hidden gem of a pallet somewhere? Where do you usually get your DIY supplies?
2. Take It Apart (Or Not!)
You’ve got two options:
- Full disassembly: gives you complete freedom in design, perfect for making boxy planters or custom sizes.
- Keep it together: flip it vertically, add some bottoms to a few gaps, and boom—you’ve got a vertical planter for herbs!
Use a crowbar and hammer to carefully pry the boards apart without splitting the wood.
3. Sand It Down
Give everything a good sanding, especially if the pallet was used before. Smooth out splinters and rough edges so you don’t snag yourself later.
🎨 Optional: Now’s the perfect time to paint or stain it if you want a pop of color or weather protection.
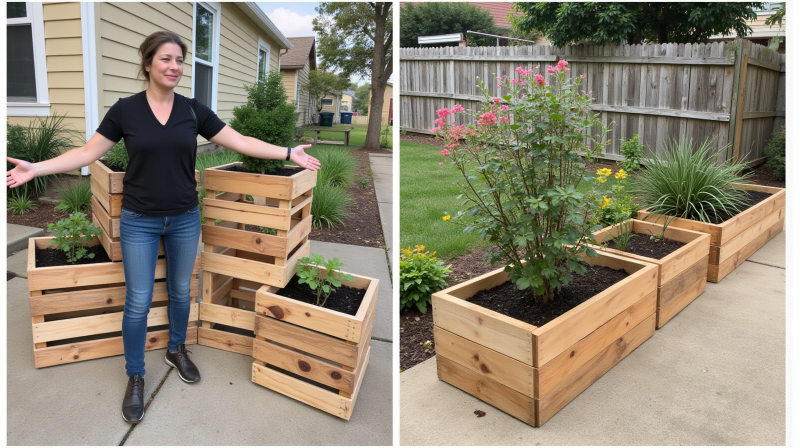
4. Assemble Your Planter Box
Measure and cut your pallet wood into the shapes you want. For a basic rectangular box:
- Two long side panels
- Two short end panels
- A base
Screw or nail them together. Simple and sturdy.
Want to get fancy? Add legs or stack multiple boxes for a tiered look.
5. Add a Liner
Staple landscape fabric inside the box to help with drainage and prevent soil from falling through any gaps.
You can poke a few small holes in the fabric base for excess water to escape. If you’re putting it indoors, consider a plastic base tray to catch runoff.
6. Fill It Up
Time to bring in the dirt! Add your soil, tuck in your plants, and water them in. Boom—you just made a planter from scratch!
🌱 Comment idea: What would you plant in your pallet box first—herbs, succulents, strawberries?
💡 Bonus Ideas
- Vertical herb wall: Keep the pallet upright and add pockets of liner + soil for a hanging herb garden.
- Painted message planters: Add fun labels like “basil”, “thyme”, or even cheeky puns like “Lettuce Grow”.
- Mobile planter: Add wheels to the bottom for easy sun-chasing.
📦 Wrap-Up
Making pallet planters is one of those DIYs that feels fancy but is totally doable, even if you’re not the handiest person. They’re perfect for gardens big and small—and hey, they’re a great weekend project that won’t break the bank.
🗣️ Over to You!
Let me know in the comments:
- What would you grow in your pallet planter?
- Want a follow-up video where we turn one into a vertical wall garden?
- Any tips or tweaks you’ve used in your own builds?
👇 Drop your thoughts and pics below—I love seeing what you come up with!


